Wednesday, June 20, 2012

My summer evenings are often spent...

working on pages in my K & Co. SMASH books! After a day full of normal stuff, from cleaning, cooking and running errands, THIS is what I look forward to and can't wait to get started doing after our dinner and dishes are finshed!

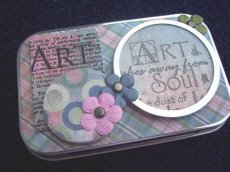
Here are some recent pages. I'm currently working on 4 different SMASH books. I have so many plans for pages and different plans for each book, but I found that I wasn't able to focus on just one book at a time. (I'm all over the place, as usual! Some things never change!) MUCH of what I'm using in my SMASH books has been found on Pinterest. So many awesome free printables, inspiring quotes and great things on Pinterest!


Well that's all I have for today. It's time for more of that normal daily stuff, so I can play later tonight!

Thursday, June 7, 2012

Project Life & SMASH sharing from a newbie at both!!

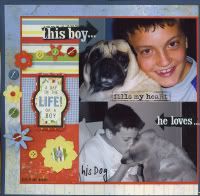
Well I mentioned yesterday that I am new to the "Project Life" style of scrapbooking and it is completely different than how I have been scrapbooking for a long, long time so I'm hoping to catch on to it and get better over time. Here is a peak at two of my favorite PL spreads so far. (to take a closer look you can just click on each image once or twice for a larger views)

These are pictures from our oldest son's Army Boot Camp graduation last November. I didn't go with a lot of journaling on this one but opted to add info via text on a couple of photos instead. I've already scrapbooked some of these photos already for another album...the old way, with more journaling about the experience, so this one is pretty much all photos.

The layouts below are about another current obsession of mine (there are SO many you know! LOL!). I'm betting that due to it's popularity, you may even share this one with me! PINTEREST! Oh, how I LOVE this website! I PIN if I'm bored, or can't do anything else at the moment, if I'm in Doctor's office waiting rooms, while I'm cooking dinner waiting for the timer to go off, those last few minutes before going to bed to make myself sleepy, and also it's a great thing to do if my hubby has a television show on at night I really don't feel like watching, but want to be downstairs with him anyway. ;o) I'm a pinning fool!

Now, back to SMASHING. I have one of the SMASH Books, (the Red Doodle Style book) that I am bound and determined to "SMASH" in... not "SCRAP" in! I have developed so many scrapbooking habits and tendencies over the years I honest can't believe how hard it's has been for me to get a hang of SMASHING as opposed to Scrapping. I'm not sure, but I may finally be getting the hang of it! Now don't get me wrong, there are absolutely no rules to SMASHING. You technically can't do it wrong, I just have a certain look I am going for, one that's different for me and what I normally do. I think my SMASH style is going to be very collage like. Once I got going on this one, I had a hard time stopping. ;o)The first photos show a Red SMASH book as they come. I haven't decorated or added any personal touches to the cover of mine yet, but will eventually do that.

Below is a look at some "Summer of 2012, Currently Loving" pages I started this book out with. These pages were a lot of fun to do. I used some pics I have taken this summer, screen shot pic of my Iphone and lots of things I found on Pinterest and printed off.


Ok, that's all of the show & tells I have for today. I need to hit the track for my morning walk and get this day started. It's going to be a busy one! Thanks for stopping by!

Wednesday, June 6, 2012

I'm BAAAAACK and I'm scrappy again!!

After a rather long, unintentional break from Scrapbooking and Blogging I am back and I'm scrapping again! Getting to be home for the summer gives me time for both! The only reasons I can come up with to explain my long break from scrapping is a possible case of burn out?? (which I never dreamed I would have!) But what more than likely played an even bigger part in my scrapping-break was the fact that my boys, whom I had spent night and day scrapbooking grew up and all of the school sports activities and dances etc. ended. I guess I didn't know what to scrap. But I'm happy to be scrapping again and if I don't have anything to scrap I'll just make something up. HA! Just kidding.

What I am finding now, is that I'm scrapping booking more about myself than I've everrrrrrr done in my life. A peak at my boys scrapbook albums for the first 15 years of their life you would probly think they were motherless, because I'm not in there. I was always behind the camera. ALWAYS!

I missed being creative. I missed having fun making things and that feeling you have when you finish and like what you've created! Some things haven't changed...like the part where I become compltely obsessed with what ever I am into at the moment and want the whole free world to be equally obsessed! Yea, I still have that little quirk. So what am I currently obsessed that YOU should also become obsessed with? Let me tell you! The Project Life method of scrapbooking. (I never saw this coming!) This is a completely different style of scrapbooking than I have spent the past 15 or so years doing and to be completely honest I didn't used to care for this style at all. Not a bit! But this way of scrapping is much simpler, quicker, and less expensive which are three things I want now after all these years. With Project Life for me this method is proving to be a hundred times more about the photos, the memories and the stories than scrapbooking has been for me for the past 14-15 years. Less stress over new techniques to either use or try to come up with, far fewer embellishments (huge $$ savings!), more photos. There is so much more focus on the photos, memories and journaling. Even though it would be normal for me to spend hours and hours on layouts, I now love the speed involved in the Project Life style of scrapping. I'll try to share a couple of my Project Life pages this week. One of them shows yet another obsession I have right now that you may very likely share with me!


Another current scrappy obsession I have right now are the K & Company SMASH books. While these books are actually not new from K & Company and were introduced to the market quite a while back, they have really taken off now, with Blogs completely dedicated to SMASH Books and SMASHing, Facebook Groups full of SMASHERS and Pinterest Pin Boards full of ideas, photos for inspiration and free printables for SMASHING. I've ALWAYS loved creating my own mini books, something I've done for ages, and I really LOVE the K & Co. SMASH Books as a sort of base for a mini book.

I love the quality of these little books. With many different styles available the "Pretty Pink" SMASH Book is definitely my favorite and I have several of these, but I also have several of the others that are available.

The first two photos show what I've done to the front cover of one of my Pink SMASH books. When purchased these books have a colored, fabric spine. The front and back covers are very sturdy hardbacks and have a unique embossed design on each different color offered. While they are pretty as they come, I decided to decorate the front of mine. The next couple of photos are a peak of some of my inside pages. This SMASH book is full of favorite photos (whether they have been scrapped a dozen times already or not! HA!)and events. The next several photos are from my Orange SMASH book and it is the first one I started for 2012. It's full of goals and resolutions for this year, favorite quotes and inspirational messages.
My SMASH motto is...the more SMASH books, the more themes you can be working on at one time! This way, everything I want to SMASH has a place! These books are tons of F U N!

If you are new to SMASH books here is a great little video.
With 15 years or more (??) of Scrapbooking I now have a lot of Scrapbooker habits. I'm in the process now of trying to SMASH with less of a Scrapbook-style and find it to be a lot harder than I would have ever guessed. I want to be super fast and sort of messy (like in the video) and I find it to be a bit of a struggle still, but I'm working on it. ;o)

Another thing I've been working on that you may of picked up on in looking at the photos above is losing weight and becoming healthier. I joined Weight Watchers in Sept. of 2011 and have so far lost almost 55 lbs!! The photo below, on the left is my "Before" photo, taken in August of last year. (2011). THIS photo was taken on the day my oldest son was leaving for the Army and THIS is the photo that truly woke me up and made me realize that my weight was compltely and totally out of control. I know it sounds crazy and hard to believe but I honestly didn't realize I looked like that, until I saw that photo later that evening after he had left. Talk about denial! The photo on the right was taken just last month, (May, 2012) on the day I reached 50 pounds lost! I am holding a jar of glass marbels that represent all of the weight I have lost to date. Each Saturday after I go to WW to weight in I come home and move my marbels from one jar to the other. When my original jar is empty...I should be at my goal weight and on my way to becoming a Weight Watcher's Lifetime Member. That is my goal!!
I am loving Weight Watchers and I'm working my way to my goal weight with hopes of becoming a Lifetime member!!
Tuesday, August 10, 2010

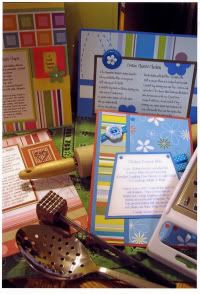
"Take It To the Fair Child ~ Chicken Parmesan!"

(Note: If you click on the photo above you can see a larger, even more mouth watering, make ya go crazy size view!"

I haven't done anything crafty in days. Instead I have been getting ready for a garage sale that I am having later this week. While I haven't been creative in a paper, adhesive or fabric kind of way... I have made some pretty dang wonderful meals lately ~ if I do say so myself! HA!

I made this chicken dish tonight and it is one of my ABSOLUTE FAVORITE recipes for Chicken Parmesan and the ONLY one I will ever use!! As usual, if I love it...I'm going to share it! ;o)

I love Italian food. I love Italian restaurants. I love my Italian husband. Ok...so he's not at all Italian, but the boy does have dark Italian like hair! HA! Ok, back to what I was talking about... It's pretty much a given that I will order the "Chicken Parmesan" or the "Eggplant Parmesan" at any Italian restaurant I go to, so I have had both dishes from many different places over the years.

THIS recipe is honestly as good as, if not better (and I really do think it's better!) than the verrrry best "Chicken Parmesan" I have ever had anywhere else!

One of the first recipes my oldest son made years ago, on his own was "Chicken Parmesan". The recipe he used was from the "Foods Teacher" at school. He made the dish at school and really liked it, so he also made it at home for us. It was good, but... this is NOT that recipe! HA!

This....is.....a..... "Slap your Italian Momma, take it to the fair child - cause you're gonna win the flippin' blue ribbon, Chicken Parmesan recipe!" I've played with this recipe enough, made enough changes, additions and tweaks that I feel an original name has been earned. ;o)

Ahhh..melt in your mouth, tender chicken with the best breading evah!! I hope you try it and like it!
------------

Melanie’s “Take it To the Fair Child ~ Chicken Parmesan”

1 ½ C. Original Bisquick mix (add more if needed)
1 T. Italian seasoning
1 T. dry parsley
1 tsp. onion salt
½ tsp. garlic salt
1 tsp black pepper
3 T. grated Parmesan cheese
2 eggs (beaten)
6 to 8 boneless, skinless chicken breasts
Enough olive oil or vegetable oil to cover the bottom of your skillet up to ½”
Your favorite pasta sauce
1 ½ C. shredded Italian cheese blend
Few more pinches dry parsley

In shallow dish or plate mix first seven ingredients together. Beat eggs in another shallow dish. Slice each chicken breast in half making two thin breast pieces. Season each with a little salt and pepper and what ever else you want then pound gently on both sides with meat tenderizer. Coat each chicken piece in the Bisquick mixture, and then dip the chicken into the egg before coating again (a second time)with the Bisquick mixture.

In a large skillet, heat oil over medium heat. Add chicken to the pan and cook, turning only once, until light golden brown and juice of chicken is clear. Center/thickest part of each piece should be 170 degrees. Place chicken on a plate with a paper towel to soak up unwanted grease.

Pour a thin layer of pasta sauce in the bottom of a 9”x13” baking dish. Place chicken pcs. on top of sauce. Sprinkle each chicken piece with Italian cheese blend, topped off with a sprinkle of dry parsley. Bake in a 350 degree oven just until cheese is bubbly and melted. Serve with Spaghetti and sauce.

Friday, August 6, 2010

Yey! Something new to add to our, "Make this again!" list!


I made this new (for us) chicken recipe tonight for dinner and it was soooo good! I had actually found the recipe on-line a while back and had saved it, thinking that it sounded like one to definitely try sometime. With the chicken, I served homemade sour cream~mashed potatoes, green beans and dinner rolls. YUM!

I only did two things slightly different than the recipe... I cooked my bacon last night and then today after I had seared my chicken breasts well and had poured the Teriyaki Sauce over them, I allowed them to cool down a bit before placing them in the fridge for about 3 hours. I didn't do this intentionally, to give them extra marinating time in the Teriyaki, but rather because I needed to do some other things this afternoon and it was actually too early to finish preparing them or to start baking them, BUT...they turned out so good and soooo full of flavor that I think I will always do it this way! I also had some fresh chives to sprinkle on top, just before serving

I only share my favorite recipes on here and this one is now a new favorite, so here it is!!

"Bacon ~ Ranch Chicken"

2 tbsp olive oil (or if you are going to make your own bacon bits, cook your bacon first and then use a little bit of your bacon grease here)

2 tbsp butter

6 skinless, boneless chicken breasts, split

1/4 cup teriyaki sauce

1/2 cup Ranch dressing (I used Kraft, "Ranch with Bacon")

1 cup shredded Cheddar cheese

1/2 lb bacon cook, and chopped(or store bought bacon bits)

Preheat oven to 350 degrees. In a large skillet, heat oil & butter (or bacon grease)over medium-high heat. Add chicken breasts, and saute 4 to 5 minutes each side, until lightly browned. Place browned chicken breasts in a 9×13 inch baking dish. Cover with teriyaki sauce and Ranch dressing. Sprinkle with cheese and top with bacon bits. Bake for 25 to 45 minutes, or until chicken is no longer pink and juices run clear.


Super easy and SOOO TASTY!!

Sunday, August 1, 2010

Finished!

Well, 99% finished. I haven't permanently adhered the felt pink-ribbon onto the canvas yet, because I still want to sew a few little pink & white seed beads on the ribbon first. Once I do that, it's finished! This canvas is one of two I that I am going to do. This one was created with my mom, "Judi" in mind. The second collage that I am going to start later today is going to be created with my Mother In-law, "Joan" in mind. They are both wonderful, strong, amazing women! (note: click on the photos to enlarge!)

Saturday, July 31, 2010

Some day I want to be a "Brave Girl"!!


It's found it's way to the top of my Bucket List! Some day I want to go to a Brave Girl camp in Idaho! If you don't know what I'm talking about, you should visit the website, www.bravegirlsclub.com. The Brave Girl's camp testimonials, camp photos and video *alone* are SOOO inspiring!

With both boys gone most of the night tonight, hubby down stairs watching Nascar & Golf...I visited the website again, watched the Brave Girl camp video again before pulling out the Mod Podge, canvas, papers, fabric, ribbon, antique buttons, felt, thread, and what ever else I found. Then I started working on a canvas collage.

The photo above is just a tiny peak. I'm finished but it's drying right now. I'll update tomorrow with better pics of the whole canvas.

Thursday, July 15, 2010

This I love!

For the past couple of days I have been playing around with making little iPod-Touch pouches.(above) I've just been making these for fun and also as a way of getting some practice time in on my sewing machine. (which is badly needed!) The only problem is that while these turned out *ok*...they just weren't *doin' it for me*, no love connection.

THEN...yesterday I remembered making these little pins (below) a few months ago and how much fun I had making them. THAT'S when I knew exactly what my next iPod Pouch was going to look like!! ;o)


And now...I'm feeling a love connection!


I will come back later tonight and update this post with some info on how I'm making these, just incase anyone wants to give it a shot! Fun & easy!

Saturday, July 10, 2010

Getting reacquainted with my friend, Janome!

Janome, my sewing machine that is. ;o) Although our relationship goes back several years, it's been a rocky one, at best! I guess you could say that we never really hit it off to begin with, at least not the way I had hoped we would. ;o) But, I just can't seem to give up and quit trying, so we are hanging out together again this weekend! So far this weekend I've (we've) made a couple of little make-up bags (above) and a couple of little iPod-Touch pouches (below).

For the make-up bags I drew my pattern onto light weight chipboard, that I just happen to have a TON of. I like to use chipboard for patterns because I can then easily re-use the pattern over and over again! Using my pattern I cut two different material fabrics (one for the outside and one for the inside of the bag) and heat bonded them together with a hot iron. Next, I hemmed the two ends of the fabric in at a 1/2", before folding the fabric in half(bag-style), wrong-side-out. Then I sewed a 1/2" hem along both the left and right hand side of the folded fabric. Once you finish sewing both sides, just flip the bag right-side-out and it's done!

For my little iPod pouches, I again used chipboard to make my pattern. For the actual pattern, I just placed my iPod on the chipboard and then I marked each of the four sides 1/2" wider and longer than the iPod. I always have a rubber case on mine, so I left it on before making my pattern. I wanted to make sure that my iPod would fit into the pouches with the rubber case on! I chose one fabric for the outside of the pouch and another fabric for the inside. This time I did not heat bond the two fabrics together.

Instead of heat bonding I sandwiched a piece of cotton batting in between the two fabrics, so that the pouch would be padded, therefore protective for iPods. I cut my cotton batting approx 1/2" smaller than my fabric on all four sides. Then I folded the top and bottom hems of the fabric at approx. 1/2" before sewing. I folded the pouch itself in half, wrong-side-out bringing the bottom up to meet the top and again hemmed 1/2" in from the edge on both the left and right hand sides. Once that is done you simply flip the little pouch right side out and it's done! Quick, easy & fun.

I'm personally loving the iPod pouches. I like that the iPod itself, with a rubber case on - fits really securely into the pouch. It's not going to slip out easily at all. IF I didn't keep a rubbercase on my iPod I would make the pouches slightly longer and ad velcro so the top could close or make a flap to fold over the top opening and again add velcro to keep it closed, because with out a rubber case they are slippery little suckers! ;o)

Sunday, July 4, 2010

Happy 4th of July!!


Well I finished painting Lauren's Fourth of July shirt last night, so they are both ready to wear to the party tonight! The first photo above is of the front of Laurens. Her shirt is a little V-neck Tee, so I painted the front design along the bottom of her shirt. The second photo is of the back of hers. Besides being a beautiful girl, Lauren is a girly-girl and loves peace signs, hearts, flowers and butterflies. I had more fun coming up with her design! ;o)


The next two pics above are of the front and back of Kyler's shirt. I considered not spelling out what he wanted on the back of his...but decided, what the heck it's all family at the party (no little ones) and the kid *is* 18, after all. ;o)
I still can't believe I just painted shirts for these two 18 year olds, but...they wanted them and I think they turned out kind-a cute! (except for the back of Kyler's maybe...remember he designed his own and I had specific instructions that I was following! HA! ;o)

Have a safe and FUN Fourth of July!!

Thursday, July 1, 2010

Seriously, I can't believe I am doing this...again after all these years!

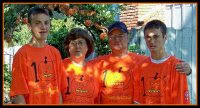
The photo above is a sketch that my oldest gave me to transfer onto a shirt via fabric paint for him to wear on the 4th of July to our annual 4th of July Party. Yes, I said my oldest. I know what you are thinking. I thought the same thing! Then his girlfriend Lauren also asked me to paint a 4th of July shirt for her to wear as well!

I down-played their requests for a day or two, thinking that surely they were teasing me because I used to paint holiday shirts for the boys when they were little for darn near every holiday I could. But, they were serious so, here I am...painting shirts again, like I did years and years ago! Pretty funny, hunh?

So, Kyler sketched the front of his(see above), the back and both sleeves. (his is stressing me out, because it came with instructions, both verbal and visual!) Lauren is letting me do what ever I want for her shirt, so that one I am excited about. ;o) I'm thinking a big Patriotic Peace Sign, hearts, flowers, fireworks etc.
The photo above shows how far i am on Kyler's so far. I have a lot more to add to it (per his specific instructions! HA!), but I'm getting there. He did give me freedom to make *minor* changes to his sketch, like I did with the red flames. ;o) A firecracker or two, some fireworks, a skull (don't ask me why a skull, I can't even begin to explain it!) and the words, "U.S.A. Kicks A%#" are supposed to be on here as well! LOL! I really thought my painting on shirts days were looooong behind me! Go figure!

Sunday, June 27, 2010

A Keeper of a Macaroni Salad Recipe!!.

Yes, another pasta salad recipe! What can I say, I LOVE pasta salads and I especially love them in the summer! This will be my lunch for most of the week this week! Those of you who know me, I mean reeeally know me, or have followed my blog over the past couple of years probly know that I have a sort of obsession with dips! I'm not afraid to admit it either. This chubby girl loves dip or as I've said before, "I've never met a dip that I didn't like!" and it's true! Is it a cream cheese thing or a sour cream thing? I'm really not sure, but you can bet that if a dip recipe has either of those two ingredients...I'm lovin' it! Well pasta salads are possibly my second foody love! I love making them as much as eating them! I'm all about the whole chopping thing. Silly as it sounds, I love to chop!

This Macaroni Salad recipe is really, really good! I absolutely love the homemade dressing that you make for this salad! I admit, I may try/sample the dressing, via finger dips (while I am chopping) before ever adding it to the salad...it's that yummy that it's hard to stay out of! And if I am the only one in this house who eats pasta salad, which sadly I am ...I don't mind knowing that my finger has previously dipped in the dressing! HA!

If you are looking for a good Macaroni Salad recipe try this one! If it is missing some of the things you love to include in pasta salads...by all means just toss them in! That's another thing I love about making pasta salads, there are no rules! Just about anything goes! ;o)

Macaroni Salad

1 lb. sliced bacon
1 16oz. pkg. elbow macaroni

1 C. mayo
1/2 C. sour cream
2 T. prepared yellow mustard
1/4 C. white sugar
1/4 C. cider vinegar
1/2 tsp. poppy seed
1/2 tsp. salt
1/2 tsp. black pepper
1/2 to 1 T. dried parsley or 2 T. fresh
2 tomatoes, seeded and chopped
1 large cucumber, peeled and chopped
1/2 C. chopped celery
1/2 C. sliced green olives
1/2 to 3/4 C. green peas
3/4 to 1 C. diced Colby cheese
1/4 C. shredded cheddar cheese (to sprinkle on top before serving only)

Cook bacon to desired crispness, crumble and set aside.

Whisk mayo, sour cream, mustard, sugar, vinegar, salt, pepper, parsley and poppy seed in a large bowl until the sugar has dissolved. Add the bacon, pasta, tomato, cucumber, celery, peas and olives, gently tossing together to combine.

Sprinkle with small amount of finely shredded cheddar cheese just before servings

Thursday, June 24, 2010

Would you care for some Sweet Tea!!

I LOVE Sweet Tea and I know some of you do too, because we've chatted about it before or drank some together! I literally crave the stuff! I decided I was buying too many and wanted to start making my own. Here is the recipe I am using and now swear by!! It's so, so good!! It's really quick and easy to make and honestly this tea tastes every bit as good as ANY sweet tea I have had if not BETTER! No more drive-thru's for me! Note: I think the KEY to this recipe is bringing the water& tea bags to a boil and then completely disolving your sugar in it afterwards, so be sure to stir really well!

The cup in the photo is from Bed, Bath & Beyond. (here in town, they are right in the front of the store as soon as you walk in. Use a coupon!!) The cups look like To-Go-Cups but they are a re-useable sturdy/heavy weight clear plastic with a sturdy plastic screw on lid and straw...AND they are dishwasher safe!

Home-made Sweet Tea and a cool not-so to-go-cup... My two newest summer-time friends!